Propagating Tulips: Tips for Growing More Beautiful Blooms

Tulips are one of the most beloved flowers in the world, known for their vivid colors and elegant shapes. Whether you’re a gardening novice or an experienced horticulturist, propagating tulips can add more vibrancy to your flower beds and gardens.
Propagating Tulips Made Easy
These captivating blooms have a rich cultural history and are symbols of beauty, renewal, and timeless elegance. Yet, behind their seemingly effortless charm lies a bit of science and art that makes tulip propagation a rewarding yet meticulous process.
Understanding how to propagate tulips is essential for anyone who wants to maximize their tulip garden. Learning a proper tulip propagation guide can transform a modest patch of bulbs into a field bursting with stunning blooms. Whether you're looking to amplify the grandeur of your garden or experiment with different varieties, propagating tulips is a skill worth mastering. Like any gardening endeavor, it requires patience, understanding, and the right techniques to ensure your blooms thrive for years to come.
The art of propagating tulips begins with knowledge about their growth cycle. Tulips are typically grown from bulbs, which store nutrients necessary for the plant to bloom. The propagation process involves cultivating these bulbs to encourage multiplication. By dividing and planting new bulbs each season, gardeners can produce more flowers, expanding their garden with healthy, radiant tulips. This tulip propagation guide will provide all the insights you need.
One of the primary benefits of propagating tulips is that it offers long-term results. A single tulip bulb can multiply into several, providing a sustainable way to grow your collection. It’s not just about increasing numbers; it’s about ensuring the quality and health of each bloom. Proper propagation methods lead to vibrant flowers, making your garden the envy of all.
The topic of tulip propagation may sound technical, but it doesn’t have to be daunting. When broken into manageable steps, the process is accessible to gardeners of all experience levels. From understanding how to care for existing tulips to knowing when and how to harvest and split bulbs, this blog will offer straightforward advice designed to yield success.
Throughout this blog, we’ll explore the best practices for propagating tulips, including ideal planting conditions and maintenance tips. We’ll also discuss pitfalls to avoid, helping you sidestep common issues that could hinder your efforts. Gardening enthusiasts who dream of seeing their tulip beds expand year after year will find this step-by-step guide an invaluable resource.
Lastly, we'll touch on how businesses like BloomsyBox offer stunning options for tulip lovers. Whether you’re sourcing inspiration, looking for guidance, or even considering gifting someone a bouquet, BloomsyBox makes it easy to access some of the most gorgeous tulip varieties. With the basics of propagating tulips under your belt, you’ll have all the tools you need to create your own displays of floral brilliance.
Understanding the Basics of Tulip Propagation
Propagating tulips may seem like a daunting task at first, but once you understand the fundamentals, it becomes an enjoyable and straightforward gardening activity. The essence of tulip propagation lies in producing more plants from existing ones, ensuring your garden flourishes year after year. Tulips propagate primarily through their bulbs, which house the nutrients necessary for growth and blooming. This natural process allows you to replenish tulips organically, enhancing the volume of your flower beds while retaining their charm and vibrancy.
To start with, understanding the life cycle of tulips is key. Tulips are perennials, meaning they bloom in cycles and return every year if properly cared for. The growth cycle begins in the fall when the bulbs are planted. During winter, the bulbs lie dormant, preparing for spring’s warmth, where the vibrant flowers emerge. After the flowers fade, the plants direct their energy back into the bulbs for regeneration. Recognizing this rhythm is crucial as it informs when and how to propagate.
Another important facet of tulip propagation is timing. While bulbs are generally dormant after blooming, this period is ideal for carrying out propagation. After the flowers have withered, the plant begins to store energy for the next blooming cycle. This is when you can lift, divide, and replant the bulbs to encourage multiplication. Timing your actions correctly minimizes stress on the plant and ensures the bulbs are healthy and productive.
Preparation is another fundamental step of tulip propagation. From selecting the right tools to preparing the soil, a bit of effort up front makes the entire process smoother. A well-prepared garden bed with nutrient-rich, well-drained soil sets the foundation for vigorous tulip growth. Equipment like trowels and bulb planters make planting and dividing effortless, ensuring precision. These preparatory actions improve the success rate of propagation by fostering an ideal setting for the bulbs to thrive.
Patience is also a key factor in propagating tulips. Unlike instant results seen with some flowers, tulips take time to grow and naturalize. The process of bulb reproduction occurs incrementally over several seasons. While it requires waiting, the payoff is a garden that blooms abundantly and consistently in the years to come. Understanding that tulips are an investment in time can help you appreciate the process rather than rush it.
Lastly, tulip propagation isn’t just about increasing numbers; it’s about enhancing bloom quality as well. By dividing and replanting healthy bulbs, you help the plants dedicate their energy to producing vibrant flowers instead of overcrowded, weakened growth. This creates a garden that not only looks stunning but thrives sustainably. Each step of the process, from planting depth to spacing, influences the final result, highlighting the importance of care during propagation.
Remember, the foundation of successful tulip cultivation lies in mastering propagation techniques. A tulip propagation guide is your ultimate tool in this process, offering step-by-step advice on handling bulbs, preparing soil, and choosing optimal planting times. With proper knowledge and effort, propagating tulips becomes a pathway to creating breathtaking displays year after year.
Choosing the Right Bulbs
Selecting the right bulbs is one of the most critical steps in propagating tulips. Not all bulbs are created equal; the quality of the bulb directly affects the health and vibrancy of the flowers. To begin with, always opt for high-quality, healthy bulbs from reputable sources. These bulbs should feel firm to the touch, free from any soft spots, mold, or signs of damage as these issues can hinder their growth potential.
Size matters when it comes to tulip bulbs. Larger bulbs typically yield larger flowers and more robust plants. They have more stored energy, which supports vigorous growth and blooming. Smaller bulbs, while still usable, might produce smaller or fewer flowers, especially in their first year. A keen eye for size ensures you’re planting bulbs that will deliver the aesthetic results you’re hoping for in your garden.
The variety of tulip bulbs also plays a role in propagation success. Different tulip types have varying needs and growth cycles. For example, species tulips tend to naturalize better, meaning they multiply more readily in your garden. On the other hand, hybrid tulips may present more challenges in propagation due to their more delicate genetics. Understanding the needs of the variety you choose is a vital component of effective tulip propagation.
Source is another critical consideration in selecting bulbs. Always purchase from reliable sellers, whether it’s a local nursery or an online platform. Inspect the bulbs before purchasing if possible, ensuring they meet the standards of health and quality. This step reduces the likelihood of introducing disease into your garden and guarantees you’re working with bulbs bred for success.
Storing bulbs correctly before planting is also essential. Bulbs should be kept in a cool, dry place until planting time in the fall. Direct exposure to sunlight, excessive heat, or moisture can trigger early sprouting or cause the bulbs to rot. Following proper storage methods ensures the bulbs remain dormant and healthy, ready to grow once they’re planted in soil.
Another often-overlooked consideration is the origin of the bulbs. Some bulbs are better adapted to specific climates or regions. Knowing where the bulbs were grown gives insight into whether they’ll thrive in your local conditions. Selecting bulbs suited to your climate increases the likelihood of a successful propagation process, resulting in better blooms season after season.
Finally, label your bulbs if you’re working with multiple varieties. This helps you track which types perform well and lets you plan your garden layout strategically. Whether growing tulips from bulbs to expand your collection or simply to beautify your space, attention to detail in bulb selection will set the stage for success in propagating tulips. With thoughtful choices, you’ll be well on your way to creating a thriving, colorful tulip garden.
Preparing the Soil
Proper soil preparation is the foundation of successfully propagating tulips. You might think tulips are low-maintenance, but for them to thrive, their soil needs to meet specific criteria. Start by choosing well-drained soil, as tulip bulbs are highly susceptible to rot if they sit in waterlogged conditions. Sandy loam is ideal for growing tulips from bulbs because it provides sufficient drainage while still retaining nutrients. If your soil leans toward clay or heavy textures, consider amending it with organic matter or sand to improve its drainage capabilities.
A tulip propagation guide often emphasizes pH balance as an essential aspect of soil preparation. Tulips prefer a slightly acidic to neutral pH, ideally between 6.0 and 7.0. Test your soil before planting to determine its pH level. If adjustments are needed, add lime to raise the pH or sulfur to lower it. This adjustment ensures that the bulbs receive the right chemical environment for nutrient absorption, promoting vigorous growth and vibrant blooms.
Adding organic material like compost or aged manure is another way to enrich the soil for tulip propagation. Organic matter not only provides essential nutrients but also improves soil structure by making it lighter and more conducive to proper root development. Spread a layer of compost over the planting area and mix it into the topsoil. This step ensures that every bulb planted will have access to a nutrient-dense environment right from the start.
Aeration plays a critical role in preparing soil for tulips. Compact soil restricts root development and can stifle the growth of propagated bulbs. Taking time to aerate the soil by loosening it with a garden fork or tiller allows oxygen to reach the bulb’s roots, fostering healthy growth. Aerated soil also increases water penetration, ensuring the bulbs get consistent hydration without oversaturation.
One often overlooked detail in preparing soil for propagating tulips is depth. The planting area should have loose soil to a depth of at least 12 inches to accommodate bulb growth. This depth provides ample room for root expansion while protecting the bulb from extreme weather conditions. Planning ahead and digging deeply also makes seasonal dividing and replanting easier as the bulbs multiply.
Before planting tulip bulbs, it’s wise to ensure the soil is pest- and disease-free. Unwanted organisms in the soil can hinder propagation efforts by attacking the bulbs. Sterilizing the soil or using natural pest control methods, such as neem oil or diatomaceous earth, can eliminate these threats. A healthy soil environment is crucial for the bulbs to grow and multiply successfully.
Finally, consider mulching after preparing the soil but before planting your tulip bulbs. Mulch helps regulate soil temperature and moisture, providing a stable environment as the bulbs settle in. Organic mulches like shredded bark or straw also break down over time, further enriching the soil. With well-prepped soil, your tulips are set up for optimal growth and blooming potential, season after season.


When and How to Plant Tulip Bulbs
Timing is everything when it comes to planting tulip bulbs. The ideal time to plant them is during the fall, roughly six to eight weeks before the ground freezes. This timeline allows the bulbs to establish their root system before winter dormancy. Proper timing is not just an optional guideline; it is a vital aspect of propagating tulips and maximizing their success in the next growing season.
Planting depth plays a significant role in the propagation process. A general rule of thumb is to plant tulip bulbs at a depth three times their height. This depth protects the bulbs from frost during winter while providing sufficient insulation and stability for their roots. For standard-sized tulip bulbs, this usually means digging a hole about six to eight inches deep. Use a trowel or a bulb planter to ensure uniform depth throughout your planting area.
Spacing is another critical aspect of planting tulip bulbs. Crowded bulbs compete for nutrients and water, which can lead to weak, underwhelming blooms. Experts recommend leaving a gap of about four to six inches between each bulb. This spacing allows each tulip enough room to grow and absorb the nutrients they need to produce vibrant flowers. Proper spacing also facilitates easy dividing when propagating tulips over the years.
Orientation matters when placing the bulbs into the soil. Ensure the pointed end is facing upwards, as this is where the stem will emerge. Planting bulbs upside down not only delays their growth but may also lead to deformed flowers. A tulip propagation guide often stresses this seemingly simple tip because it can make a substantial difference in the plant's development.
Watering immediately after planting is a crucial step in the process. While tulip bulbs don’t need excessive water during their dormant period, one good soaking after planting helps settle the soil and stimulates early root growth. However, be mindful not to overwater, as soggy soil increases the risk of bulb rot. The key is balanced moisture, enough to encourage establishment without drowning the bulb.
One important consideration is your planting layout. A well-designed tulip garden not only improves aesthetics but also enhances propagation opportunities. Grouping bulbs in clusters or rows makes it easier to monitor their growth and manage their care in the long term. Planting tulips in sunny locations with good air circulation further boosts their chances of thriving and multiplying.
Lastly, label your planted areas to keep track of different tulip varieties, especially if you're growing multiple types. Marking your planting zones ensures that you can monitor performance, assess propagation success, and maintain the desired layout each season. Following these best practices provides a strong start for growing tulips from bulbs, setting the stage for healthy plants and a dazzling array of blooms.
Seasonal Care for Tulip Growth
Caring for tulips doesn’t end with planting; it’s a year-round commitment that ensures your blooms return each season stronger and more vibrant. The success of propagating tulips largely hinges on seasonal maintenance, as each phase of the year presents unique challenges and tasks. Understanding the seasonal requirements of tulips ensures they receive the care they need, thriving through all weather conditions.
Spring is the season of glory for tulips as they bloom in full force. During this time, it's essential to deadhead spent flowers to redirect the plant's energy to the bulb, rather than seed production. Avoid cutting back the foliage prematurely, as tulips use their leaves to photosynthesize and store energy in the bulbs for next year’s growth. This crucial step supports healthy propagation by strengthening the bulb’s reserves.
Summer is a time of dormancy for tulip bulbs. Once the leaves have yellowed and died back naturally, gently lift the bulbs from the soil if required, especially in regions with very wet summers. Stored in a dry, cool place with good air circulation, these dormant bulbs are safeguarded from rot and moisture damage. This downtime is vital for propagating tulips as it preserves the health and viability of the bulbs.
Autumn marks the beginning of the tulip planting season. Replant the bulbs carefully, adhering to best practices outlined in your tulip propagation guide. Adding fresh mulch to the soil not only regulates temperature but also provides a nutrient boost for newly planted bulbs. Regular mulching also helps prevent weeds, allowing the tulips to grow without competition once spring arrives.
Winter brings its challenges, particularly in terms of frost protection. While tulip bulbs are hardy, extremely cold temperatures can sometimes damage them. A thick layer of mulch or straw provides important insulation during the harshest months. For areas prone to heavy snow or ice, using burlap or frost covers can be an effective way to shield bulbs until the season transitions into spring.
Another underappreciated aspect of seasonal care involves pest management. Throughout the year, tulip bulbs are susceptible to critters like voles, as well as fungal diseases that could jeopardize propagation efforts. Regularly inspect your planting area for signs of damage or infestation. Natural repellents or bulb cages can prevent pests from undermining your propagation goals.
Monitor your tulips’ overall health through the seasons, noting any unusual growth patterns or reduced blooming. By paying attention to their cyclic needs, you'll not only maintain their beauty but also promote more effective propagation. Seasonal care is the backbone of successful gardening, providing tulips with the stability and nourishment they need to multiply and flourish.
The Role of Fertilizers in Propagation
Fertilization is often the difference between average tulip blooms and breathtaking displays. While tulip bulbs come with stored resources, they benefit substantially from supplemental nutrients throughout their growth cycle. Using the right fertilizers in appropriate amounts is key to successfully propagating tulips and enhancing their long-term viability.
Before planting, consider enriching the soil with a balanced, slow-release fertilizer. Products low in nitrogen but rich in phosphorus and potassium encourage strong root development, which is critical for growing tulips from bulbs. Incorporating these nutrients during soil preparation sets the stage for healthy plant growth and abundant blooming.
Once tulips sprout in spring, apply a light layer of fertilizer to support their active growth phase. A water-soluble solution works well at this stage, quickly delivering nutrients to the developing plant. Be cautious not to over-fertilize, as an excessive buildup of nutrients can overwhelm the bulbs and potentially scorch the roots. Moderation is key to ensuring effective nutrient absorption.
Fertilization after the blooming phase is just as important. This is when tulips focus on energy storage, preparing for next year’s cycle. Using a post-bloom fertilizer high in phosphorus helps replenish the bulbs, boosting their vitality for future multiplication. Organic fertilizers like bone meal are also popular additions to tulip propagation guides, providing a slow but steady release of nutrients over time.
For those new to propagating tulips, granular fertilizers are often a convenient option. Sprinkle them evenly around the bulbs after planting and water them in lightly. The granules gradually break down, releasing nutrients into the soil. These slow-release formulas minimize the risk of burning the bulbs, making them an excellent choice for beginners.
Pay close attention to the health of your soil before applying fertilizers. Over time, high fertilizer use can lead to nutrient imbalances or even soil degradation. Conduct periodic soil tests to ensure the conditions remain optimal for growing tulips from bulbs. This step helps you select the best fertilizers and avoid over-application.
Organic alternatives, such as compost tea or well-aged manure, are excellent supplements to traditional fertilizers. These natural solutions improve soil quality while providing a balanced nutrient profile. Available in both liquid and solid forms, organic fertilizers are a sustainable way to support tulip propagation efforts and maintain long-term soil health.
Finally, timing your fertilization correctly maximizes its effectiveness. Avoid applying fertilizers during dormancy, as the bulbs won’t actively absorb nutrients. Instead, focus your efforts on early spring and post-bloom stages, when the tulips are most receptive to added nutritional support. By understanding the pivotal role of fertilizers in propagation, you can elevate the quality of your tulip blooms and ensure their sustainability for seasons to come.
Dividing and Replanting Bulbs
Dividing and replanting bulbs is a crucial step in propagating tulips, ensuring a thriving and vibrant garden year after year. Tulips naturally reproduce by creating offsets, small bulbs that grow alongside the parent bulb. Over time, these clusters can become overcrowded, leading to diminished blooms. Properly dividing and replanting bulbs gives each one the room and resources it needs to grow healthy and strong.
The ideal time to divide tulip bulbs is during their dormancy period, usually in late summer to early fall. Once the foliage has completely died back and the bulbs are dormant, carefully dig them up using a garden fork or spade. Be gentle to avoid damaging the bulbs, especially the smaller offsets, as they are more fragile and prone to injury.
After digging up the bulbs, separate the offsets from the parent bulb. This is relatively easy as they naturally detach without much effort. Examine each bulb for signs of damage, rot, or disease, discarding any that appear unhealthy, as planting these could infect the healthy ones. This is a critical step in a tulip propagation guide to ensure successful blooms.
Once divided, allow the bulbs to air dry for a day or two in a cool, dry place. This process helps to prevent mold or fungal growth before replanting. While drying, label the bulbs if you are managing multiple varieties to keep your tulip garden organized and visually appealing according to your original design.
When replanting, follow the same spacing and depth guidelines you used for planting tulips initially. The bulbs should be planted pointy side up, spaced four to six inches apart, and buried at a depth about three times their height. Adding a small layer of compost or bone meal to the planting holes provides a nutrient boost to new offsets, encouraging robust growth.
One of the benefits of dividing and replanting is the opportunity to enhance your garden's layout and design. You can experiment by grouping tulips of similar colors together or creating patterns. This adds a fresh look to your garden while promoting better bulb health through adequate spacing.
Dividing and replanting bulbs is an essential maintenance task for propagating tulips effectively. It not only revitalizes your garden but also ensures long-term sustainability for your tulip collection. By paying attention to your bulbs’ needs and providing them with the proper care, you set the stage for vibrant and abundant blooming seasons ahead.
Dealing with Common Pests and Diseases
Pests and diseases can pose significant challenges when propagating tulips. These issues not only affect the health of your bulbs but can also hinder the multiplication process, diminishing your garden’s overall vibrancy. Knowing how to identify, prevent, and manage common problems helps safeguard your tulip investment and ensures strong future growth.
One of the most common pests gardeners encounter is the tulip bulb fly. These flies lay eggs near or on tulip bulbs, and once the larvae hatch, they burrow into the bulbs, causing significant damage. To prevent an infestation, regularly inspect your bulbs during the dormancy period. Remove and discard any affected bulbs to stop the pest’s life cycle and protect the remaining healthy ones.
Mice and voles are another frequent issue. These small rodents consider tulip bulbs a delicacy and can decimate a garden during winter. Using wire mesh or bulb cages can shield your bulbs from becoming a meal. Additionally, placing repellents, like crushed garlic or castor oil, around your planting area can deter these critters.
Fungal diseases such as Botrytis blight, also known as tulip fire, are a major concern when growing tulips from bulbs. This disease causes unsightly spots on leaves and deforms the blooms, reducing the aesthetics of your garden. To prevent it, practice good garden hygiene by clearing away dead plant material and ensuring proper air circulation around your tulips.
Root rot is another hidden threat, often caused by waterlogged soil. Overwatering or poor drainage leads to this disease, which can wipe out entire clusters of bulbs. Following a tulip propagation guide that emphasizes planting in well-drained soil helps minimize this risk. Adding sand or peat moss to heavy soil can improve drainage and create a healthier environment for your bulbs.
Aphids can also become a nuisance, particularly during the spring growing season. These small insects feed on tulip stems and leaves, stunting growth and spreading diseases. Spraying your tulips with a mix of water and mild soap is an eco-friendly way to deter aphids without harming the plants or surrounding environment.
Preventative measures, such as crop rotation, can greatly reduce the incidence of pests and diseases. Avoid planting tulips in the same spot every year, as this practice diminishes the soil’s biodiversity and invites recurring problems. Rotating your planting areas disrupts the life cycles of pests and reduces soil-borne diseases.
Finally, always purchase bulbs from reputable suppliers to ensure they are healthy and disease-free. Introduced diseases can quickly spread and compromise an entire garden. Taking these steps to manage pests and diseases not only protects your current blooms but also fosters healthier propagation for seasons to come.
Maximizing Bloom Potential
Achieving breathtaking tulip displays is all about optimizing the conditions for their growth. While tulips are resilient and adaptive, intentional care can significantly boost the number and quality of their blooms. Understanding the nuances of propagating tulips helps enhance their visual appeal and increases their blooming potential over time.
Start with high-quality bulbs. Premium bulbs are more likely to produce larger, healthier flowers. Look for bulbs that are firm and free from any mold, blemishes, or soft spots. Investing in quality at the start ensures that your effort in propagating tulips leads to lasting success.
Providing ample sunlight is another critical factor. Tulips thrive in full sun, requiring at least six hours of direct light each day. Plant them in a sunny spot where they can absorb the energy necessary for photosynthesis. This energy is stored in the bulbs and directly impacts next year’s bloom potential.
Watering practices also play a key role in maximizing tulip blooms. While tulips are drought-tolerant once established, they do require consistent moisture during active growth in spring. Water deeply but infrequently, ensuring the soil dries out between watering sessions. This approach keeps the bulbs hydrated without risking rot.
Nutrient-rich soil supports stronger, more vibrant blooms. Amending your soil with compost or slow-release fertilizers gives tulips the minerals they need to thrive. During the growing season, you can apply specific bloom-boosting fertilizers high in phosphorus to further support flower development. This step aligns with many tips found in a comprehensive tulip propagation guide.
Deadheading spent blooms is essential for directing energy back into the bulbs instead of seed production. This simple practice prevents the plant from wasting resources and helps prepare the bulb for next year’s blooming season. Remove the flower heads while leaving the stems and leaves intact to allow photosynthesis to continue.
Pay attention to spacing, as overcrowded bulbs compete for nutrients and water, resulting in smaller, less vibrant flowers. If your tulip clusters start to thin out or produce fewer blooms, consider dividing and replanting the bulbs to restore their vigor. Adequate spacing not only maximizes bloom size but also makes your garden more visually appealing.
Lastly, protect your tulips from extreme weather conditions and pests. Frost covers during unexpected cold snaps or natural deterrents for voles and aphids can save your blooms from potential damage. With consistent care, propagating tulips becomes an rewarding process that yields spectacular, colorful displays every growing season.
Integrating Tulips into Your Landscape
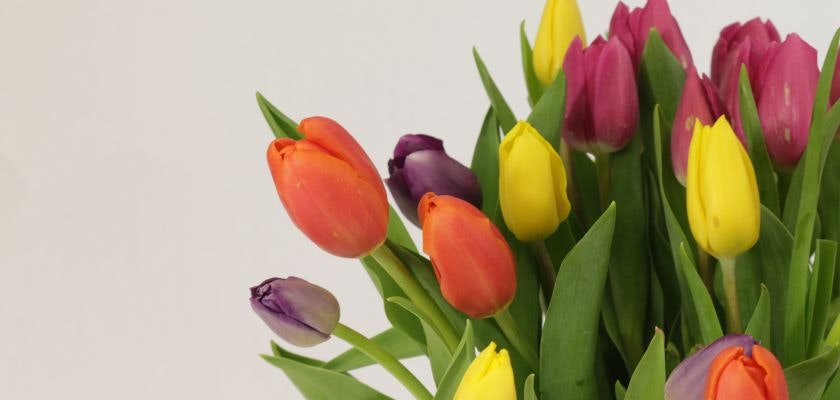
Tulips are a versatile addition to any garden or landscape design. Their vivid colors and elegant shapes instantly elevate outdoor spaces, making them a favorite among both casual gardeners and professionals alike. From formal gardens to wildflower beds, tulips seamlessly integrate into various styles, adding charm and vibrancy.
Begin by considering a tulip bed as a standalone feature. A concentrated area of tulips in striking colors can serve as a focal point in your garden. Select complementary hues to create a harmonious look or bold contrasts for more dramatic impact. Experimenting with color combinations allows you to express creativity while enjoying the beauty of propagating tulips.
Interplanting tulips with other spring flowers like daffodils or hyacinths creates a stunning layered effect. This strategy not only enriches the visual diversity of your garden but also promotes biodiversity, which benefits the entire ecosystem. Pairing tulips with plants of varying heights adds depth, making the overall design more dynamic and engaging.
Tulips also work beautifully in borders and pathways, guiding the eye and defining garden spaces. Planting tulips along walkways creates a colorful corridor that draws attention. Varying the bloom times of the selected tulip varieties ensures a continuous display of flowers throughout the season, keeping your landscape lively and inviting.
For a more natural aesthetic, consider integrating tulips into wildflower meadows or woodland gardens. Scatter bulbs throughout the area for a spontaneous, carefree look that mimics nature. This approach works particularly well with species tulips, which have a more delicate, botanical appearance.
Containers and planters provide another opportunity to prominently feature tulips in smaller spaces. Whether placed on patios, decks, or balconies, tulips in pots bring bursts of color to locations where in-ground planting isn’t an option. You can even mix different bulb varieties in one container to create a mini-tulip garden.
Using tulips in a theme-based garden design opens up a world of possibilities. Imagine a Romantic Garden with shades of pink and white tulips interspersed with roses or a Modernist Garden featuring minimalistic clusters of sleek, single-color tulips. Propagating tulips gives you the flexibility to curate a specific aesthetic that reflects your vision.
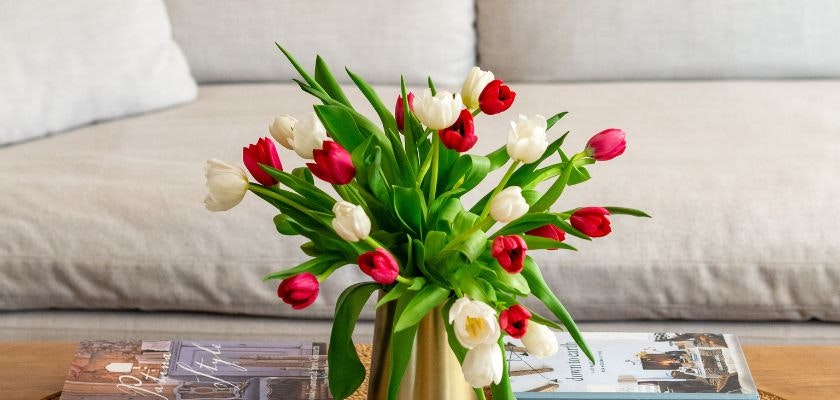
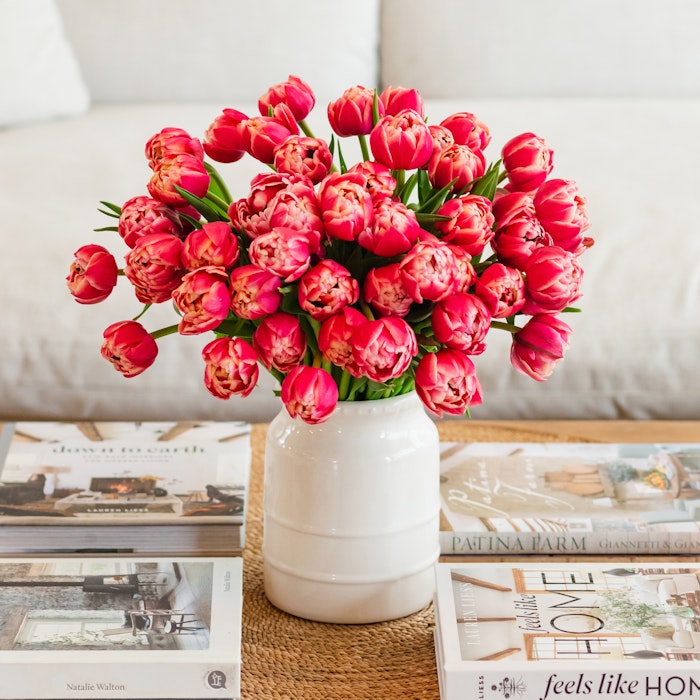
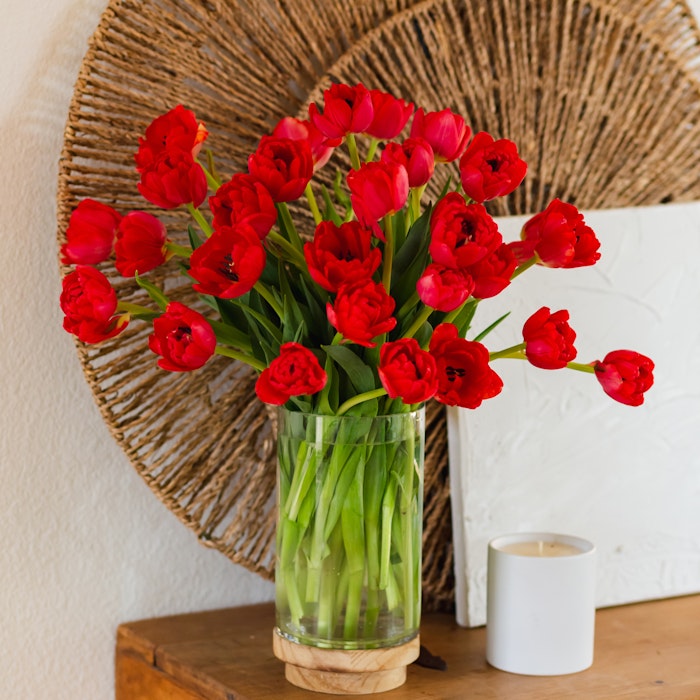
Finally, tulips make excellent cut flowers. Growing tulips from bulbs isn’t just for outdoor beauty — they also enhance indoor spaces. Arrange them in stylish vases or bouquets to bring seasonal cheer into your home. Their vibrant colors and unique forms are perfect for celebrations or everyday décor, adding versatility to their beauty. Integrating tulips into your landscape allows you to enjoy these exquisite blooms in a multitude of creative ways, showcasing their timeless elegance in any setting.
The Art of Tulip Propagation & BloomsyBox
The conclusion of propagating tulips isn’t just about cultivating vibrant flowers—it’s a reflection of dedication, patience, and understanding nature’s rhythm. By mastering tulip propagation, you open up a world of possibilities, whether creating a breathtaking home garden or simply reviving your flowerbeds. From choosing quality bulbs to ensuring ideal growing conditions, every step you take makes a difference in the blooms you’ll achieve.
When it comes to planning your propagation efforts, you can go beyond beautifying your garden and aim to share that beauty with others. Imagine being known as the one who consistently creates vibrant tulip-filled gardens. Better yet, think about how that connection to nature can inspire family and friends to nurture their own green spaces. This tulip propagation guide is your gateway to establishing that legacy.
Gardening isn't just about nurturing plants; it's about nurturing yourself. The act of planting, tending, and watching tulips grow gives a sense of fulfillment that's hard to replicate elsewhere. Propagating tulips often leads to self-discovery. Through this process, people develop a deeper appreciation for nature's wonders and life’s fleeting beauty.
With businesses like BloomsyBox.com, tulip enthusiasts can further explore their passion. Whether you're mastering propagation or seeking the perfect bouquet, they offer a diverse range of floral options for every occasion. Don't just stop at growing; get inspired by the best blooms available. Be sure to click here to browse their Tulips Collection and see what gorgeous varieties await you.
For those times when gardening alone won’t do, consider searching for tulip bouquet delivery near me. It’s a great way to make someone’s day brighter while showcasing the beauty of tulips. Companies like BloomsyBox bridge the gap between home-grown joy and professional floral arrangements, providing the best of both worlds.
Finally, remember that propagating tulips is a gift that keeps on giving. Start small, dream big, and watch your garden evolve. Whether it’s bulbs you’ve propagated or a bouquet from a trusted source, tulips bring endless joy. Make every season more colorful and every bloom more meaningful with these tips and tools.