When and How to Plant Tulips for a Stunning Spring Garden

Tulips are a timeless symbol of spring and renewal, celebrated for their colorful blooms and elegant shape. Whether you're cultivating a small backyard garden or a sprawling flowerbed, planting tulips is a rewarding way to welcome brighter days.
These versatile flowers come in an array of varieties, so they’re perfect for creating a display that’s as unique as your gardening vision. With the right knowledge, preparation, and care, you can transform your outdoor space into a vibrant haven.
Timing is everything when it comes to gardening, and tulips are no exception. Knowing the best time to plant tulips ensures they flourish when the weather warms up. But timing is just one piece of the puzzle. Preparing your soil, understanding the specific needs of tulips, and planning for their care will go a long way in creating a thriving display. Thankfully, this guide will walk you through every step.
From selecting the healthiest bulbs to deciding where and how to plant them, tulip gardening can feel overwhelming for beginners. Yet, with the right approach, even novice gardeners can enjoy beautiful results. Tulips aren't just about flowers—they’re a symbol of hope, beauty, and the joy of growth. Their presence in a garden instantly elevates its aesthetic appeal and adds warmth.
Historically, tulips have been celebrated for their cultural significance. Originating from Central Asia, they gained immense popularity in Europe during the 17th century, a period known as “Tulip Mania.” Today, they remain garden favorites due to their vibrant hues and low-maintenance nature. But achieving those picture-perfect blooms takes a bit of planning and effort.
When planning your tulip garden, diversity is key. With early, mid, and late-season tulips, you can extend the blooming period and keep your garden alive with color throughout spring. Varieties like Darwin hybrids or fringed tulips bring different textures and sizes, adding interest to any border or bed. By incorporating diverse options, you can enjoy a dynamic and continuous tulip display.
If you’re a newcomer to gardening, sourcing quality tulip bulbs is crucial. Companies like BloomsyBox can take the hassle out of finding exceptional bulbs, offering a curated selection shipped straight to your door. Starting with top-quality bulbs gives your garden the best possible foundation for long-lasting blooms and healthy growth.
This guide will not only show you the best time to plant tulips but will also cover preparation tips and essential maintenance steps. By following these recommendations, you’ll gain the confidence needed to take on tulip gardening and provide your garden with a burst of seasonal elegance.
Selecting the Best Tulip Bulbs for Your Garden
Begin your tulip gardening project by focusing on the bulbs. Healthy bulbs are the foundation of a successful tulip display. When shopping, prioritize bulbs that feel firm and fat—akin to a fresh garlic clove. Pass on bulbs that appear soft, shriveled, or moldy. Remember, the quality of your bulbs largely determines the success of your spring blooms.
Size matters when it comes to tulip bulbs. Larger bulbs produce sturdier stems and bigger flowers, essential for eye-catching displays. Smaller bulbs might offer compact blooms, perfect for tight spaces or unique arrangements. Understanding the relationship between bulb size and bloom quality will help you make informed choices.
Selecting the right varieties is another important step. Consider Triumph tulips for their classic shape and vibrant colors or Parrot tulips for their dramatic, feathery petals. Experiment with different types to create layered interest in your garden beds.
Timing your bulb purchase is equally important. The best time to buy tulip bulbs is in early autumn, just before planting season. Look for suppliers known for their attention to quality, like BloomsyBox, which pre-selects and packages premium bulbs.
Your garden’s characteristics should guide your choices. If you have a sunny yard with good drainage, most tulip varieties will thrive. However, those with clay-heavy soil may need to look for species better adapted to less-than-ideal conditions or improve their garden’s drainage capabilities first.
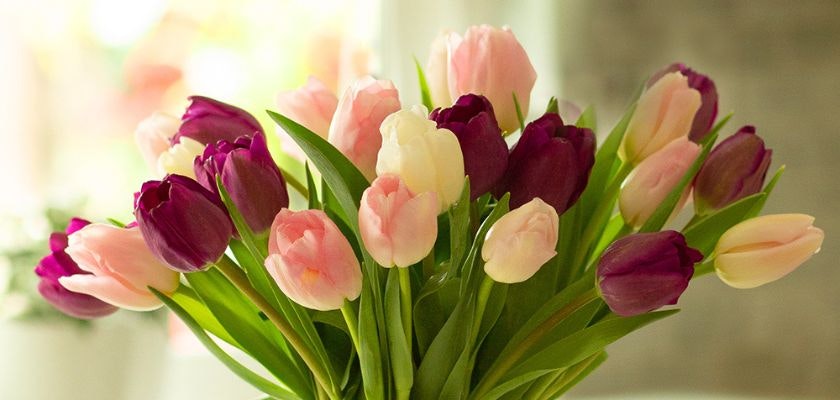
When planning your tulip color palette, think about the final visual impact. While single-color tulip beds create a bold uniform statement, multi-colored arrangements provide variety and depth. Research complementary tones and experiment with combinations to achieve captivating displays.
For gardeners who wish to stand out, rare tulip varieties such as fringed or double-petaled types offer unique blooms. These specialty tulips are sure to become a focal point, adding sophistication and charm to your green space.
Lastly, planning should include a mix of early, mid, and late spring bloomers to extend your garden’s vibrancy. This strategy keeps your tulip display lasting for weeks instead of days. Combining varieties like Emperor Tulips for early blooms and Darwin hybrids for later display guarantees sustained spring excitement.
Once purchased, store bulbs properly until you’re ready to plant them. Keeping them in a cool, dark place ensures dormancy and prevents them from sprouting early. This step is especially important if you live in areas where planting season begins later.
Timing Is Everything - The Best Time to Plant Tulips
Tulips need cold soil to establish strong roots before winter freezes. The ideal planting period typically falls between mid-fall and early winter. For most gardeners in temperate climates, this means late September through November, depending on your local weather conditions.
Timing not only ensures healthy blooms but also prevents premature growth. When tulips are planted while the weather is too warm, they might begin sprouting above ground instead of focusing on root development. Aim to plant after the first frost of autumn but before hard freezes set in.
Keep your region’s USDA hardiness zone in mind. If you live in a colder area, plant earlier in the fall to give bulbs enough time to settle. Conversely, in milder climates, later planting ensures the bulbs still experience the necessary cooling period.
Regularly check local weather forecasts. Unexpected warm spells sometimes delay planting dates, so stay flexible. The perfect timing relies on cool soil—ideally below 60°F at planting depth—for optimal root growth.
For those wondering how they can track soil temperature, that’s where digital tools come in handy. Invest in a soil thermometer to make precise decisions about the ideal planting day. Simple steps like this can drastically enhance your tulip gardening success.
It’s easy to get overwhelmed with all the preparation, but starting strong with quality tools and supplies sets you up for success. At BloomsyBox, the focus on delivering healthy bulbs ensures you can plant whenever your garden is ready, without last-minute complications.
This advice doesn’t only apply to tulips in garden beds. Containers follow similar rules, though their soils may cool faster than in-ground gardens. You also have greater flexibility to move container gardens out of harm during early frosts.
No matter where you plant your tulips—containers, gardens, or along pathways—aligning planting dates with local conditions goes a long way toward ensuring success. Tulips are forgiving in some ways but demand discipline in timing.
Your efforts during this phase are worth every ounce of preparation. By planting at the right time, tulips bloom into one of nature's most visually rewarding displays. Gardening, after all, is about patience and the ultimate joy of waiting for spring.


Preparing the Perfect Soil for Tulips
Healthy soil is the foundation of a thriving tulip garden. Tulips prefer well-draining, loose soil that prevents water from pooling around their roots. Standing water can cause bulbs to rot, making soil preparation an essential step for successful growth.
Start by inspecting your garden's current soil conditions. Sandy or silty soils are preferable because of their natural drainage capabilities, whereas heavy clay soil might require amendments. If your soil is too compact, consider loosening it with sand, compost, or organic material to promote better root development.
Testing your soil's pH level is another vital measure. Tulips thrive in neutral to slightly acidic soil, ideally within a range of 6.0 to 7.0. Home testing kits are readily available online or at garden centers, and adjusting pH with lime or sulfur can help optimize conditions.
Adding organic matter, like compost or well-rotted manure, enriches the soil with nutrients while improving its structure. Organic matter encourages healthier tulip growth by enabling consistent access to moisture and nutrients during their development.
Before planting tulips, dig your flower beds to a depth of about 12 inches. Loosening the lower layers of soil allows for better aeration and ensures that the roots can expand freely. Aerated soil is especially beneficial for tulips planted in compacted areas or newly-prepared garden beds.
Ensure the soil is slightly moist but not waterlogged. Overly wet soil can suffocate the bulbs and prevent effective rooting. If you've experienced heavy rainfall prior to planting, wait for a few days to allow the soil to dry out partially.
Consider applying a slow-release bulb fertilizer specifically formulated for tulips. These fertilizers provide consistent nutrients and promote robust blooms in the spring. Mix the fertilizer into the soil during preparation for the best results.
Mulching your tulip beds is another useful tip to retain soil moisture and maintain a more stable temperature. Organic mulch, such as straw or shredded bark, not only prevents water evaporation but also protects bulbs through harsh winter conditions.
If you're planting tulips in containers, select a potting mix with excellent drainage and avoid ordinary garden soil. Containers should have sufficient drainage holes to prevent water accumulation. Add a layer of gravel at the bottom to further enhance drainage.
Good soil preparation lays the groundwork for all your tulip gardening efforts. Taking these preparatory steps ensures your bulbs remain healthy and have the best chance of flourishing into a stunning spring display.
Mastering the Technique of Planting Tulips
Though tulips are beginner-friendly, proper planting techniques make all the difference in their growth and beauty. The first step is determining the correct planting depth. Tulip bulbs should be planted approximately 6 to 8 inches deep, depending on their size.
To measure the depth, use a garden trowel or bulb planter marked with a ruler. Planting too shallow may expose the bulbs to cold damage, while planting too deep makes it harder for them to sprout in spring.
Maintaining the correct spacing between bulbs is equally essential. Space tulip bulbs 4 to 6 inches apart to ensure they have room to grow without overcrowding. Proper spacing also improves air circulation, reducing the likelihood of fungal diseases.
Position bulbs with the pointed side facing upwards. This part of the bulb will give rise to the flower stem. Planting bulbs upside down can delay or prevent sprouting, so always double-check their orientation as you place them in the ground.
Once planted, cover the bulbs gently with soil and pat it down lightly to remove air pockets. Air gaps around bulbs can hinder root development, so a firm yet gentle touch ensures proper contact between the bulb and soil.
Avoid watering the soil immediately after planting unless it is particularly dry. Tulips typically root best in cool, moderately moist soil. Overwatering can cause pooling around the bulbs, increasing the risk of rot before they even begin to root.
Consider planting tulips en masse for a dramatic garden display. A cluster of bulbs creates a more concentrated visual impact compared to scattering individual bulbs sporadically across the garden. Designs like zigzag patterns or concentrated groupings add dynamism to your spring arrangement.
If you want a layered garden bed, consider planting tulips with other springtime bloomers like daffodils or crocuses. Their overlapping bloom periods provide an extended season of color, and their differing heights ensure visual interest throughout the garden.
Tulip containers require a slightly different approach. You can plant bulbs closer together in pots than in gardens since they don't need as much long-term root space. Layering tulip bulbs with varying bloom times in pots can create a continuous display of fresh flowers.
Planting tulips properly ensures your garden starts strong. By dedicating time to each step of the process, you maximize your chances of enjoying healthy, vibrant tulip flowers as spring unfolds.
Essential Tulip Gardening Tips for Winter and Beyond
After your tulip bulbs have been carefully planted, ongoing care is essential to ensure they survive winter and thrive when spring arrives. The first step post-planting is mulching your garden beds with a layer of organic material to protect bulbs from harsh winter temperatures.
Resist the temptation to fertilize during winter. Bulbs are dormant until spring, so they won't utilize extra nutrients during this period. Overfertilizing can cause chemical imbalances in the soil, ultimately affecting the bulbs' growth in the months ahead.
Keep an eye on precipitation levels throughout winter. Tulips don't need additional watering except during prolonged dry spells. Too much moisture can lead to rot, especially in areas with poor drainage.
Winter is also the perfect time to protect your bulbs from pests. Squirrels, rabbits, and other animals may dig up the bulbs for food. Cover your garden beds with chicken wire or mesh to deter hungry critters from disturbing your planting efforts.
As spring approaches and green shoots emerge, remove any protective mulch to allow sunlight to reach the new foliage. However, don't remove the mulch too early; sudden late frosts can damage tender sprouts.
If you spot weeds growing around the tulip sprouts, remove them carefully without disturbing the bulbs. Weeds compete with your tulips for nutrients and water, so keeping the area tidy ensures healthier flowers.
Start regular watering once the soil consistently warms, but only water at the base of the plants to prevent fungal infections. Good watering practices will help the tulips flourish during their active growth phase.
Deadheading your tulips after they bloom is a key maintenance task. Snip off the spent flowers to prevent the plant from putting energy into seed production. By doing so, tulips can focus on building stronger bulbs for the next growing season.
After the foliage begins to yellow, avoid cutting it too early. Tulips spend this time gathering energy for future blooms. Wait until the leaves are fully wilted before trimming them back.
To renew your garden’s vibrancy, consider replanting tulips every few years. Although some varieties are perennial, most tulips lose their vigor over time. Adding fresh bulbs keeps your garden continuously thriving and full of life.
Final Steps to Ensure Your Tulips Thrive
As your tulip garden begins to take shape and grow, you've entered the most rewarding phase of tulip gardening. Yet, there are a few final steps that can make the difference between an average garden and a truly stunning display of spring blooms.
First, monitor the blooming process closely. Tulips vary in their bloom timing, depending on the variety, planting depth, and soil conditions. Watch for early-maturing species to open up first, signaling the start of a captivating cascade of color in your garden.
If you've planted a mix of early-, mid-, and late-blooming tulips, enjoy watching the progression of flowers adding layer upon layer to your garden's beauty. This staggered blooming ensures that your garden remains lively and vibrant well into the spring season.
Once your tulips are in full bloom, consider photographing or journaling the growth process. Tulip gardens not only provide visual joy but also document the effort it took to cultivate them. Reviewing this process will also give you insights into ways to improve or expand your garden next year.
Post-bloom care is equally important. After the blooms fade, resist the urge to cut back the foliage right away. The leaves are still gathering and storing energy for the bulb's future growth. Only trim the foliage once it has turned completely yellow and wilted.
Tulips often store enough energy in their bulbs to bloom again the following year. To maximize this chance, apply a balanced fertilizer to the soil after the blooms have faded. This replenishes nutrients lost during the growing season and strengthens the bulbs for next year.
Lastly, assess the location of each tulip group. If certain areas performed better than others, consider whether differences in sunlight, soil quality, or proximity to other plants played a role. For future seasons, you might relocate bulbs or expand your garden to optimize for even better results.
Creating a Blooming Future
Tulip gardening is a labor of love, and the results always justify the effort you put in. Each season brings a new opportunity to refine your approach, experiment with varieties, and double down on successful methods. The constant cycle of gardening, blooming, and perfecting is part of what makes tulips so special.
By now, you've likely noticed how tulips brighten up not just your garden, but also your mood. Few plants strike the same balance of elegance and joyfulness, making tulips a treasured addition to any space. Just imagine the response when neighbors, friends, or family see your vibrant display of blooms!
Tulips are also an incredible way to express creativity. Consider planning next year's garden with bold color combinations or incorporating unique patterns and designs into your planting. Gardening is yet another medium for creative expression, and tulips provide plentiful options to test your artistic side.
While maintaining your tulip garden, remember that every garden evolves. Factors like weather, soil health, and bulb quality can shift year to year, meaning your garden will always feel like a living, dynamic project. This adaptability ensures that gardening never becomes dull.
These beautiful flowers can also serve as a source of inspiration for other garden features. Perhaps the tulip bed sparks interest in companion plants or leads you to invest in decor, pathways, or seating nearby to enjoy the garden more fully.
For gardeners who are just beginning their tulip obsession, turning to experts for advice and supplies can make a world of difference. BloomsyBox, for example, is renowned for providing high-quality tulip bulbs that make planting simple and successful. Their curated selections remove much of the guesswork, helping you focus on the joy of gardening.
Finally, tulip gardening represents far more than a seasonal effort. It connects you to nature’s cycles, brings bursts of beauty into the everyday, and opens the door to cultivating a lifelong hobby. The patience and care you invest are always rewarded with stunning, uplifting flowers come spring.
Why BloomsyBox Stands Out
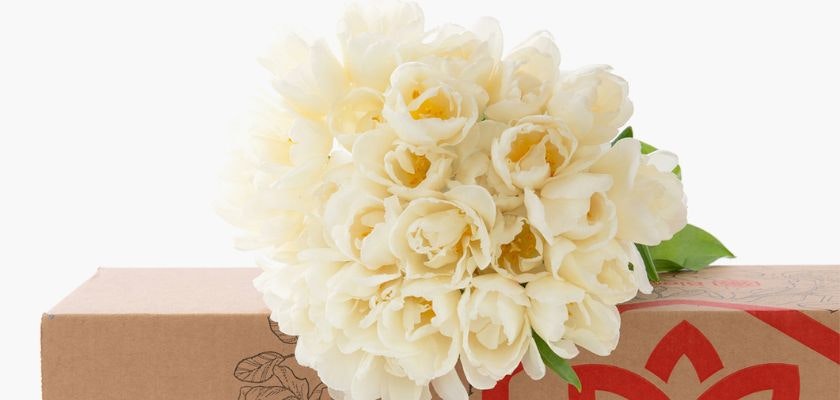
When it comes to bringing joy and elegance into your home, BloomsyBox stands as a trusted choice for tulip lovers everywhere. Their commitment to delivering fresh, vibrant tulip bouquets for delivery straight to your door ensures you experience the simple joy of beautiful blooms without any hassle. Visit BloomsyBox.com to explore our stunning arrangements or click here to browse our Tulips Collection and find the perfect bouquet for your space or a thoughtful gift.
BloomsyBox prioritizes quality over quantity, meaning every tulip bouquet arrives in pristine condition. Whether you're celebrating a special occasion, brightening up your living space, or sending a thoughtful gift, their meticulously crafted arrangements are designed to impress.
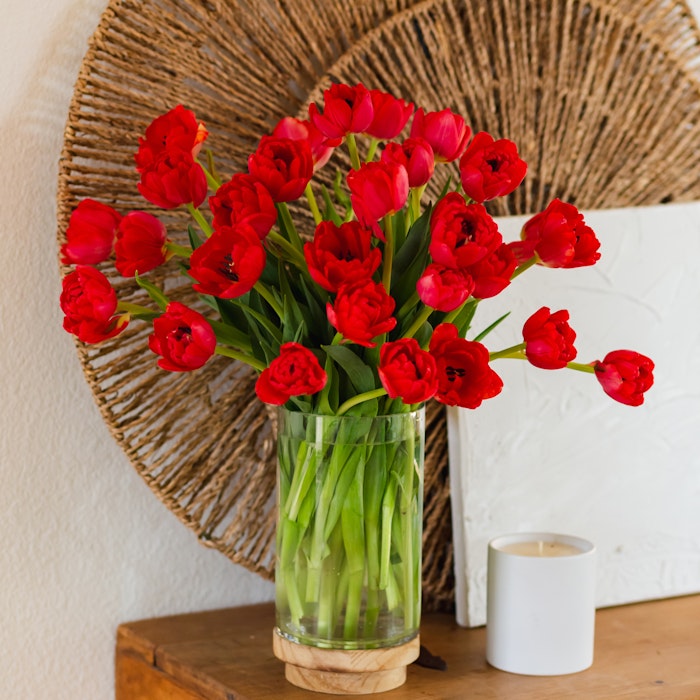
One standout feature of BloomsyBox is their attention to detail. Each bouquet is curated with care and arrives ready to display, making it easy for anyone to enjoy the beauty of tulips without extra effort. These thoughtfully arranged stems add elegance and charm to any setting, whether it’s a cozy home or a bustling workplace.
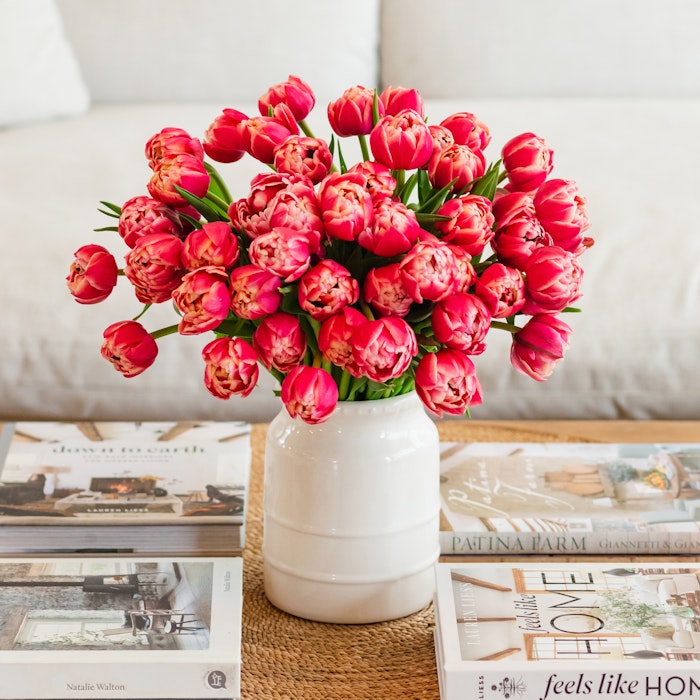
Additionally, BloomsyBox offers a wide selection of tulip bouquets to suit every taste and style. Whether you prefer classic single-color arrangements or a striking mix of specialty tulips, their offerings are unmatched in variety and beauty. The thoughtful designs ensure there is something perfect to delight every flower enthusiast.
For those who appreciate convenience and reliability, BloomsyBox ensures that every bouquet is delivered in a timely, secure manner, maintaining the freshness and vibrancy of the blooms. If you've ever struggled to find high-quality tulip bouquets locally, their delivery service provides a seamless solution, making exceptional florals accessible from the comfort of your home.
BloomsyBox also highlights seasonal tulip arrangements, reflecting the unique beauty of each time of year. This commitment to staying in tune with nature’s rhythm adds a special touch to their bouquets, making every delivery feel fresh, thoughtful, and timely.
Discover the joy of fresh flowers with BloomsyBox. Their dedication to creating and delivering stunning tulip bouquets provides a simple way to bring nature's beauty into your life. Whether you’re purchasing for yourself or someone you love, their arrangements are a perfect way to celebrate life’s moments, both big and small.
Simply receiving a bouquet of tulips can transform your space and your mood, offering daily reminders of nature's elegance and color. With BloomsyBox, you’re not just receiving flowers—you’re welcoming beauty, joy, and warmth into your world.